Summary
Omnivex Moxie has the functionality to automatically update a license by writing the license file into the installation directory for a Moxie Data Server. Typically, this is the method that works for most installations.
Occasionally, the automatic update process is prevented from completing because of network firewalls or other network security protocols. Should this be the case, then a manual update of the license file is required.
Solution
There are 5 steps to manually update the Moxie Data Server license:
- Step 1: Stop the Omnivex Moxie Data Server service on the data server computer.
- Step 2: Locate and delete any existing data server license files.
- Step 3: Copy the new license file into the data server's directory.
- Step 4: Start the Omnivex Moxie Data Server service on the data server computer.
- Step 5: Confirm the new license has been activated by the data server.
Step 1: Stop the Omnivex Moxie Data Server service on the data server computer.
- If the data server computer:
- a) is running Windows XP, then:
- Click Start > Run. The Run dialog box appears.
- Type services.msc.
- Press ENTER. The Services window appears.
- b) is running Windows Vista, 7 or 2008, then:
- Click the Start button.
- In Search programs and files, type services.msc.
- Press ENTER. The Services window appears.
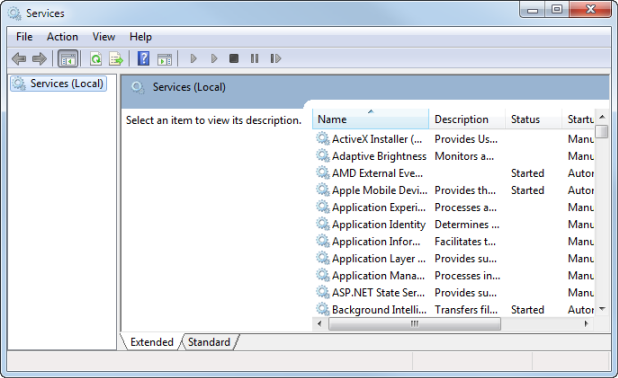
- a) is running Windows XP, then:
- From the right pane, browse the list of services and select the Omnivex Moxie Data Server service.
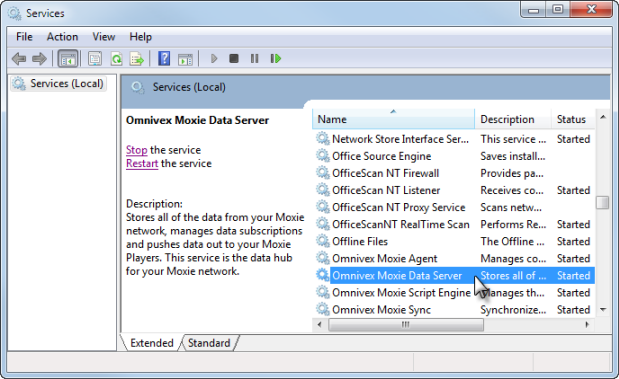
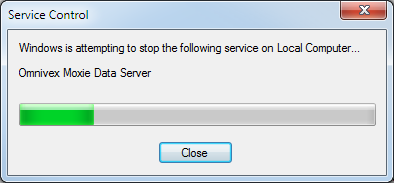
- Click Stop the service. The Service Control dialog box appears displaying the progress of the service shutdown.
Step 2: Locate and delete any existing license files.
Note: This section requires that the computer is configured to display file type extensions (the 3 letter suffix added to the names of all files on the system). These extensions should be exposed so that the license file can be found. Microsoft Windows hides file type extensions by default. Information regarding exposing file type extensions is in the Additional Information section at the bottom of this article.
- Using Windows Explorer, browse to the data server directory. If the computer is a:
- 32-bit Windows system, browse to: C:Program Files > Omnivex > Moxie > Data Server
- 64-bit Windows system, browse to: C:Program Files (x86) > Omnivex > Moxie > Data Server
- Locate any LIC files in this directory and delete them. If this is a new installation, there will not be any LIC files present. LIC files end in the file type extension .lic.
Step 3: Copy the new license file into the data server directory.
- Copy the new license file, that arrived via E-mailed from Omnivex, into the Data Server directory.

Note: The license file is sent with a .lic extension, but occasionally E-mail systems filter out unknown file types. To circumvent these filters, Omnivex' registration department will send you a license file with a .txt file type extension. If this is the case, rename the file type extension to .lic after copying it into the Data Server directory.
Step 4: Start the Omnivex Moxie Data Server service on the data server computer.
- If the Data Server computer is running:
- Windows XP, then:
- Click Start > Run. The Run dialog box appears.
- Type services.msc.
- Press ENTER. The Services dialog box appears.
- Windows Vista, 7 or 2008, then:
- Click the Start button.
- In Search programs and files, type services.msc.
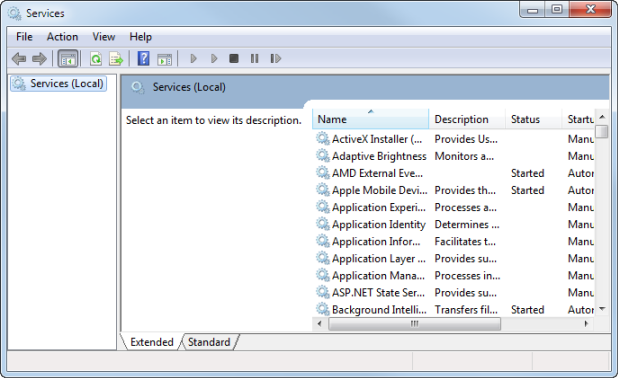
- Press ENTER. The Services window appears.
- Windows XP, then:
- From the right pane, browse the list of services and select the Omnivex Moxie Data Server service.
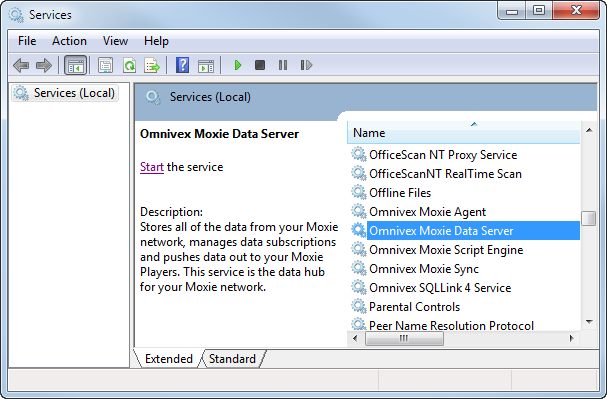
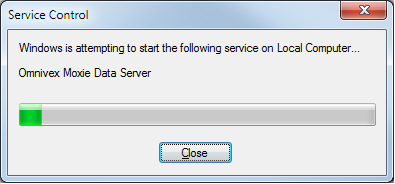
- Click Start the service. The Service Control dialog box appears displaying the progress of the service startup.
Step 5: Confirm the new license has been activated by the data server.
- Start Moxie Studio.
- On the Home tab in the ribbon, click Studio Options. The Studio Options dialog box appears.
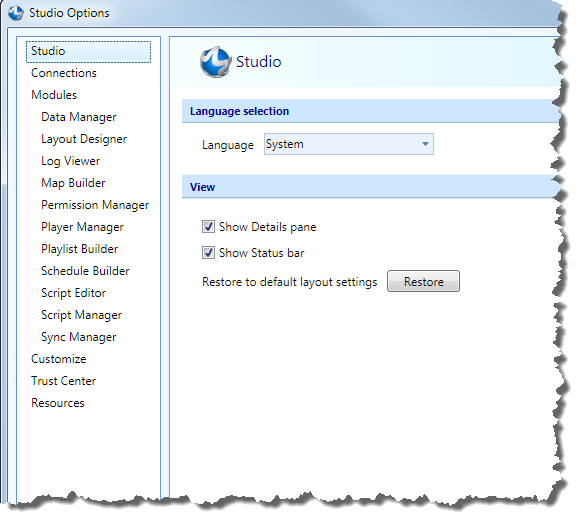
- In the left pane, click the Connections tab. The Connections dialog box appears.
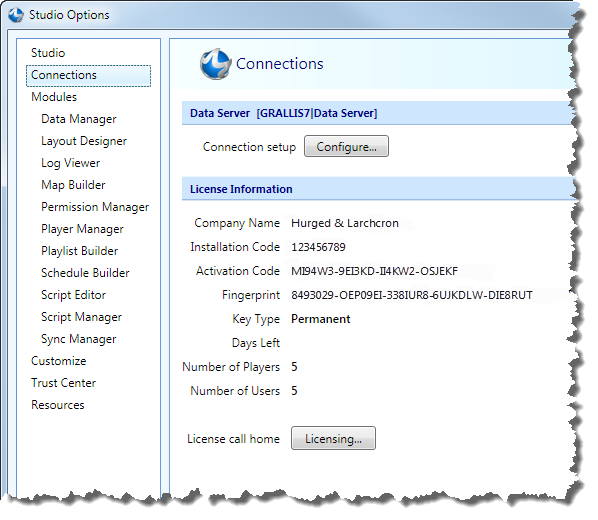
- Confirm the licensing information.
- Click OK.
Additional information
If file type extensions are not visible, then they are hidden and need to be exposed. Windows hides file type extensions by default.
To expose file type extensions:
- Open the system Control Panel and select Appearance and Personalization. The Appearance and Personalization control panel appears.
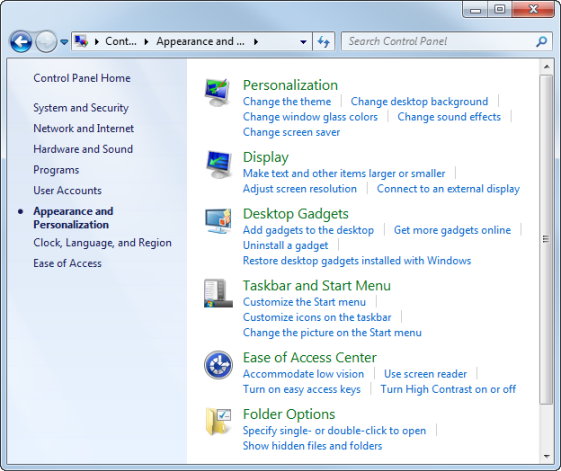
- Click Folder Options. The Folder Options dialog box appears.
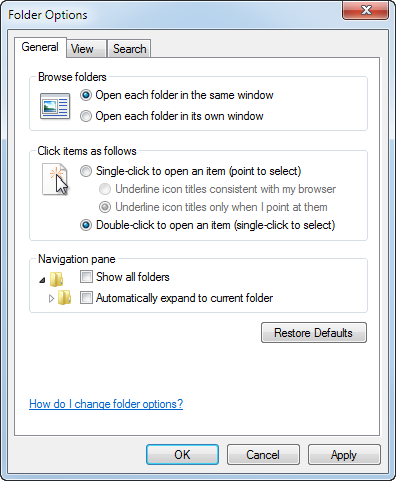
- From the View tab, clear the Hide extensions for known file types check box.
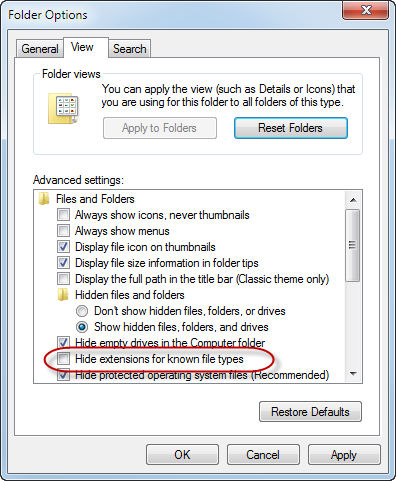
- Click OK.