
In Omnivex Ink, data binding is the process of connecting a property in an App (such as text, an image, a chart value, or a schedule) to a live data source, typically a Sheet. When the underlying data changes, the App updates automatically without requiring the Designer to edit or republish the content.
For example,
- A Sheet contains today's cafeteria menu
- A Text component is bound to the cell containing the entrée name.
- The cafeteria team updates the Sheet from "Chicken Wrap" to "Pasta Primavera."
- The App immediately displays the new value without manual editing.
Similar to the simple example above, it is possible to dynamically change when a component is displayed based on a schedule via databinding.
How a Schedule works in Ink
Each schedule in Ink is composed of one or more schedule definitions. Each schedule definition contains:
- A start and end date
- An option for various days of the week
- An option for showing the component for the entire day
- Start and end times during the day if not showing all day long
A single schedule definition is straightforward. Combining several definitions together is useful for handling complex scheduling requirements.
For example, take a complex scenario where an image should appear on:
- Weekends all year long
- Weekday mornings during the summer
- Weekday evenings during the winter
- All day on holidays
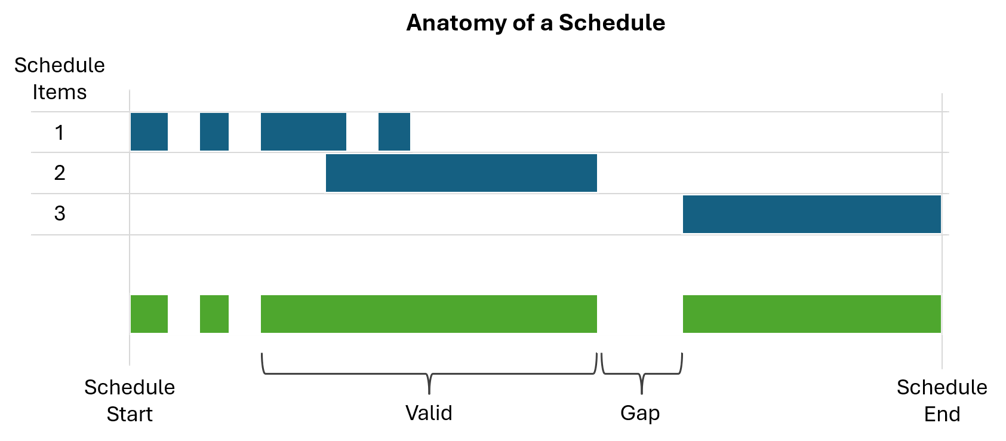
This schedule can be simplified by breaking it into the four parts and creating a schedule definition for each part and then stacking them together to work jointly. As long as at least one of the schedule definitions is true at any given time, then the result of the stack is also true. The entire schedule stack is considered to start when the first item is valid and runs until the last item concludes, even though there may be gaps between the start and end.
How to Databind a Schedule
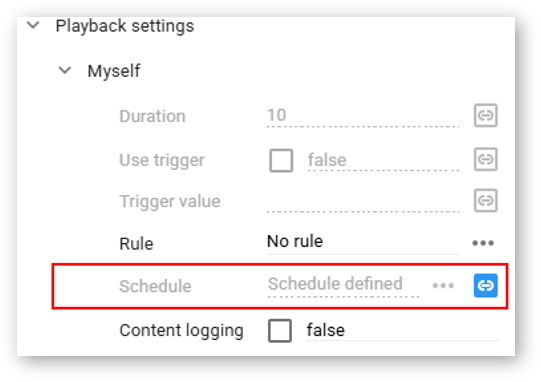
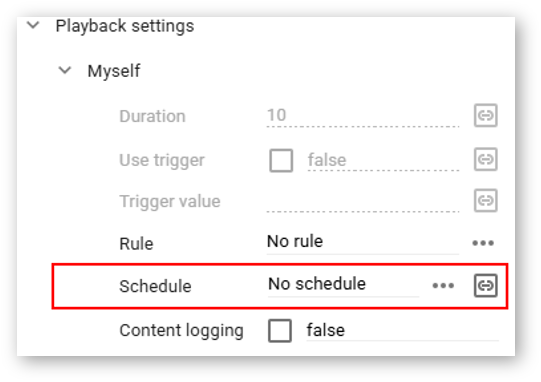
Every component in the Ink App Designer has a property called Schedule that allows you to set or databind a schedule that controls when that component should be visible in the app. Click on the link icon and in the Databinding dialog select the sheet and cell where the schedule data is written.
Format of the Schedule
Note: All times and dates in the schedule are in local time to the Display.
The schedule is written in JSON and must follow the standard rules on JSON formatting. In order to fit in a sheet cell, the whitespace is removed so the text fits on a single line. This line is entered into the databound sheet cell.
Example of a single item schedule:
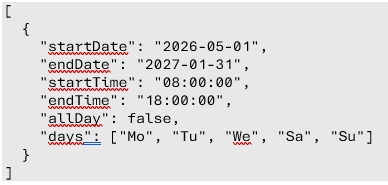
This is then reduced to a single line and entered into the databound sheet cell:

Example of a three item schedule:
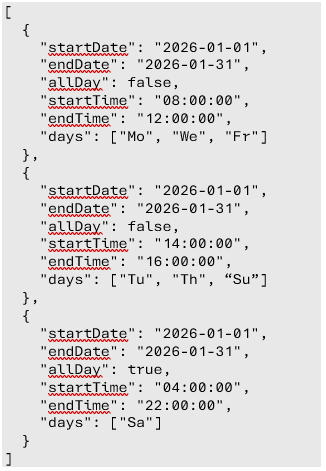
Again, this must be reduced to a single line and entered into the cell. Cells can hold very long strings so you don’t have to worry about overflowing them.

Data formatting
- startDate and endDate must be strings in YYYY-MM-DD order such as “2026-12-31” with a valid date
- startTime and endTime must be strings in HH:mm:ss (24 hour) format such as “21:30:00” with a valid time
- allDay must be a boolean value (not a string in quotes) such as false
- If allDay is true, then startTime and endTime values are ignored but these properties must still be present
- Week days must be in an array of strings and use only the first 2 letters of the week day in English with the first letter being capitalized such as [“Mo”, “Tu”, “We”, “Th”, “Fr”, “Sa”, “Su”]
What happens if the schedule format is invalid?
- If the schedule is invalid in any way the component will be treated as if it has NO schedule, which means that it will play all the time.
What is an invalid schedule?
- If the given schedule is not in proper JSON format as a list as shown above
- If any of the values are outside normal calendar and time ranges
- If any of the properties listed above are missing
- If any of the property values are in the wrong format as specified above
- If any of the property values are null
- If endDate comes before startDate or endTime comes before startTime