
Gen2 Driver Platform - How to Add a Display
1. Introduction
In order to keep current with the ever expanding market of new smart displays becoming available from a wide range of manufacturers, Omnivex has introduced a new driver platform we are calling the Omnivex Ink Gen2 Drivers. All existing drivers will continue to work and will be termed Legacy Drivers. Over time, these Legacy Drivers may be upgraded to Gen2 Drivers.
The only change that will be apparent to Ink users with this new release is an expanded Add a Display dialog on the Display showcase. This document covers the changes to this dialog and the new features it supports.
2. Adding a Predefined Display
The first new feature that the Gen2 Drivers support is the ability to predefine a Display that is not currently connected to Ink but will be connected at a future time. This is useful if you have taken delivery of a number of screens but aren’t planning on installing them right away. By predefining the Displays in Ink you can set up them ahead of time, name them, assign an App and metadata, and have them automatically download the appropriate content once they are installed and connected.
This is done by specifying the manufacturer and the serial number of the screen. Once that particular display hardware is connected to Ink, a match will be made and the appropriate settings will be assigned to the Display.
When the Add a Display dialog opens, the Predefine a display option is selected. Select Next to move to the second step.
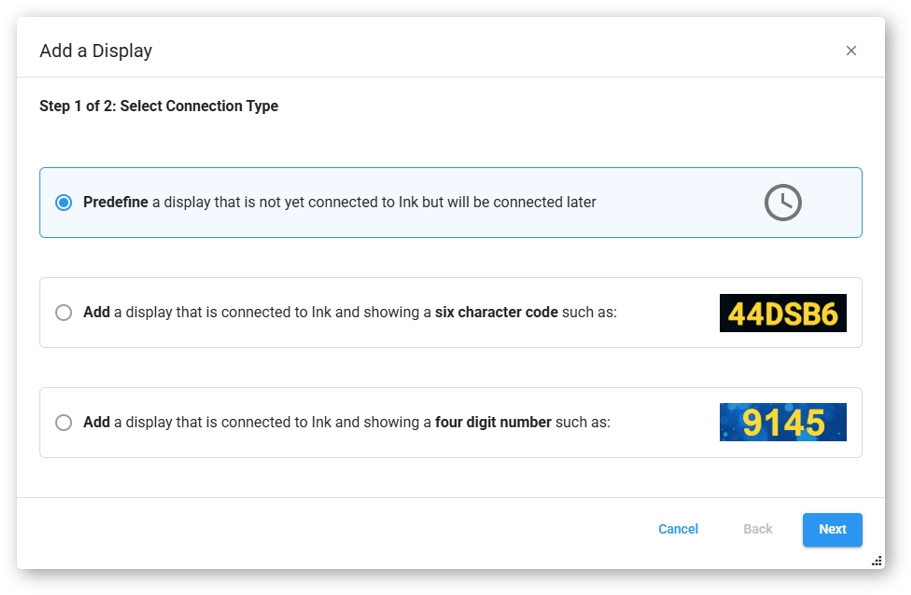
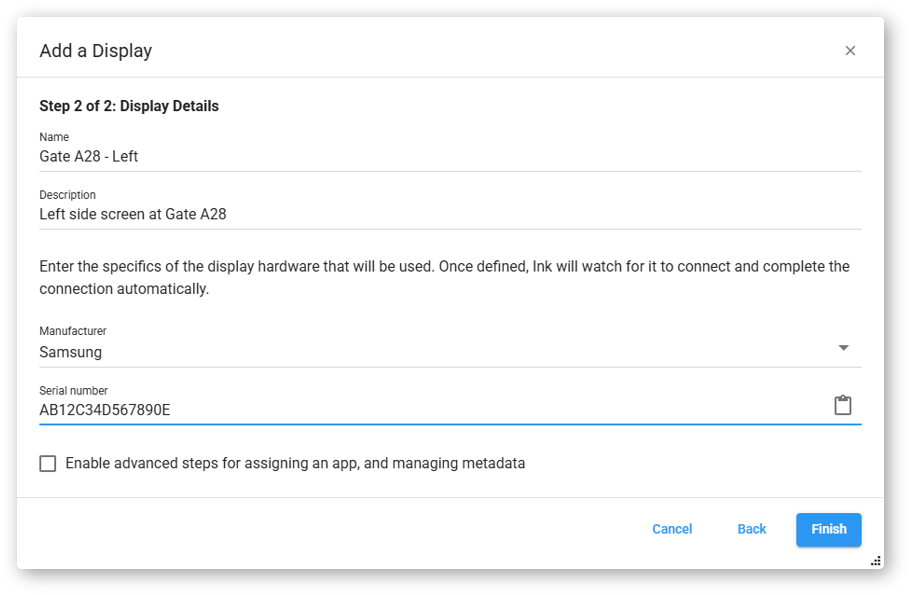
On the second step you can enter the Name and Description of the Display, the Manufacturer of the hardware, and the Serial number. You can also enter an optional Description.
If you would like to add metadata or assign an App at this point, you can check the Enable advanced steps... checkbox at the bottom and move to section 5 of this document. If you plan to enter this Display information at a later date, simply click Finish.
When a predefined Display has been added to Ink, it will appear in the Display showcase and can be managed like any other Display. It can be renamed, assigned an App, have metadata applied to it, etc.
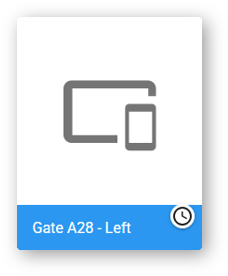
Since the screen hardware has not actually been connected to Ink, the Display will not show as either Connected or Disconnected. Instead, the status will be shown as Pending and the icon will indicate the Pending state.

When the screen hardware with the matching manufacturer and serial number is connected to Ink, the status icon will change to a green check.
3. Adding a Display with a six character code
The Gen2 Driver has a different status screen from the Legacy Drivers. Both drivers show a connection identifier when they start. The Legacy Drivers show a four digit number and the Gen2 Drivers show a six character code (assuming the Display has not been predefined).
Below is a screenshot of the Gen2 Driver connection screen. Each screen will show a different six character connection code.
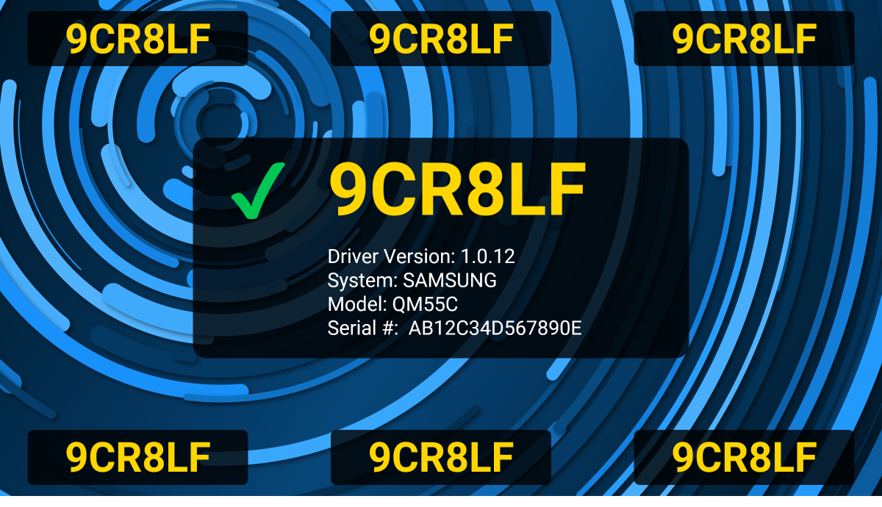
If your connected screen has a six character code, select the second option on the Add a Display dialog and press Next.
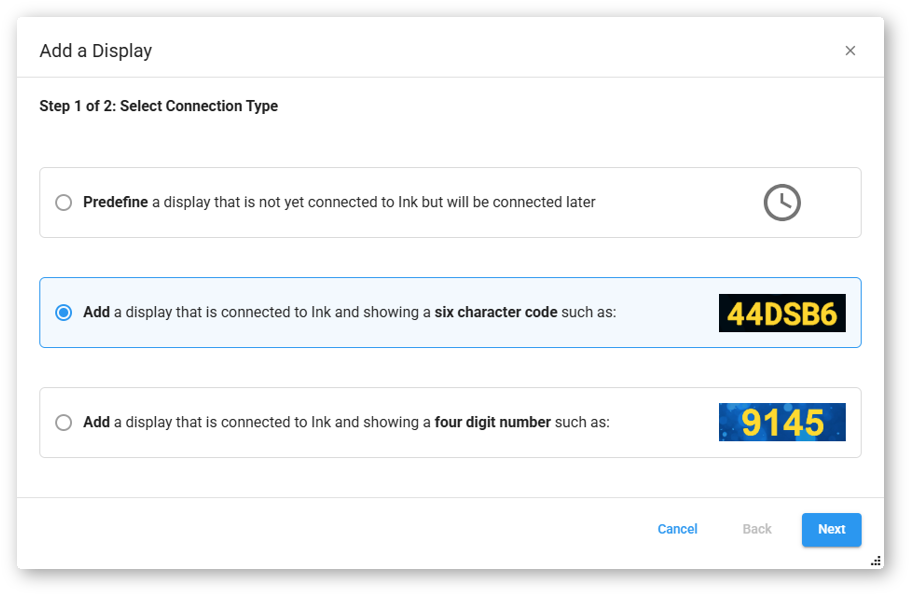
On the second step you can enter the Name of the Display, an optional Description, and the six character code shown on the connection screen.
If you would like to add metadata or assign an App at this point, you can check the Enable advanced steps... checkbox at the bottom and move to section 5 of this document. If you are going to perform these steps at a later date, you can simply click on Finish.
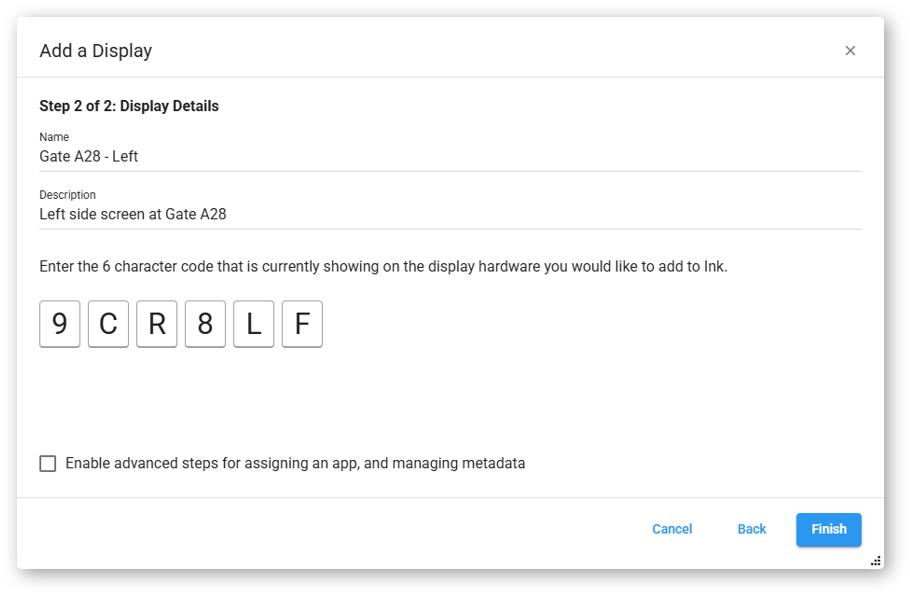
If you enter the six characters incorrectly you will be presented with the following message. Simply correct the character code and try again.
4. Adding a Display with a four digit number
The connection screen for Legacy Drivers looks like this and shows a four digit number as a connection code.

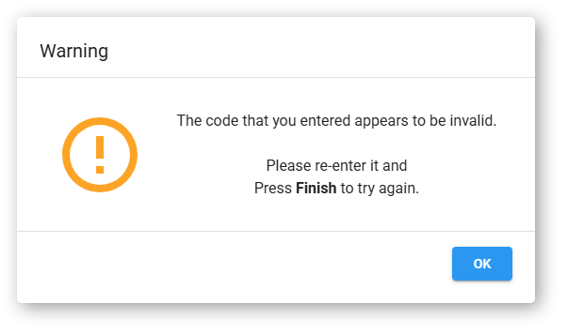
If your connection screen looks like this, then select the third option on the Add a Display dialog and press Next.
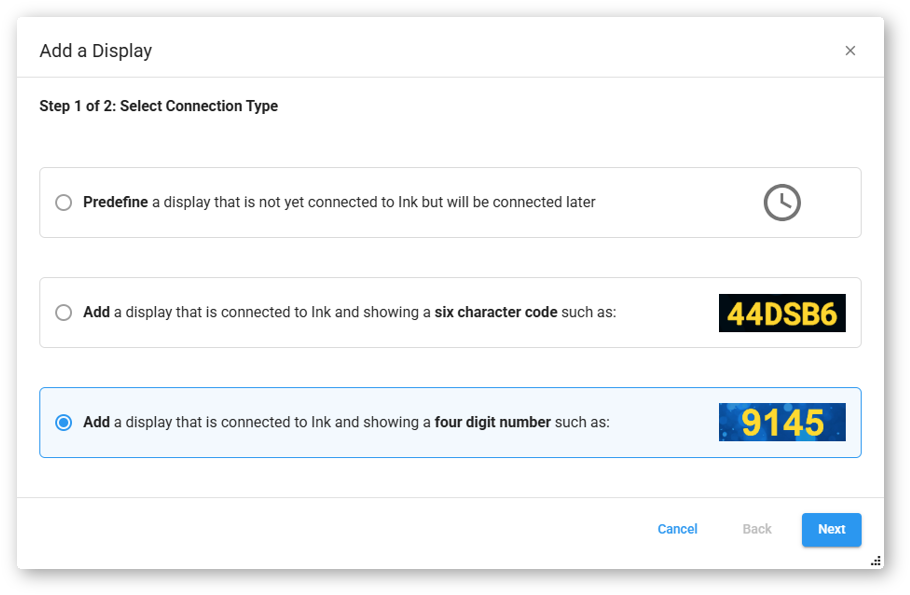
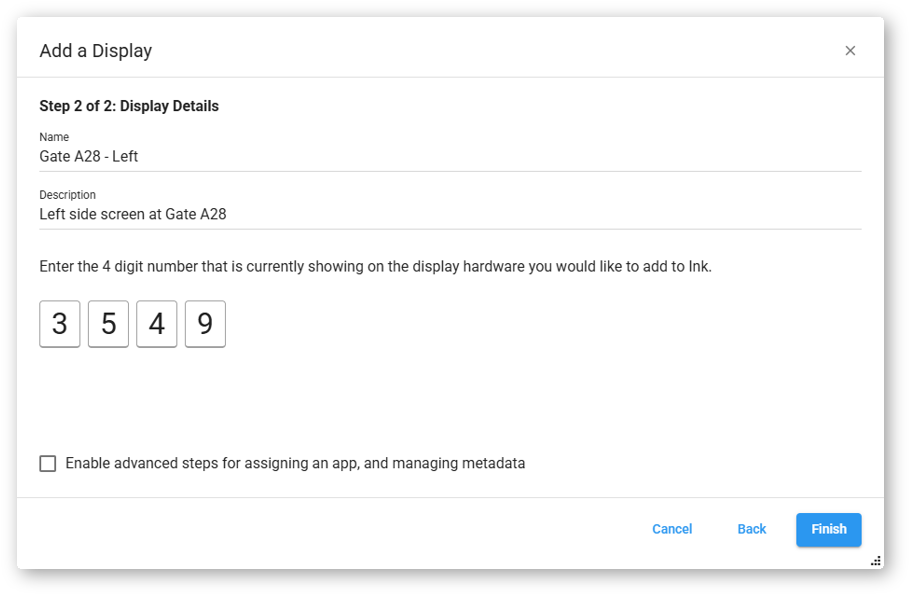
On the second step you can enter the Name of the Display, an optional Description, and the four digit number shown on the connection screen.
If you would like to add metadata or assign an app at this point, you can check the Enable advanced steps... checkbox at the bottom and move to section 5 of this document. If you are going to do these things later you can simply click on Finish.
5. Extending the Display definition with additional capabilities
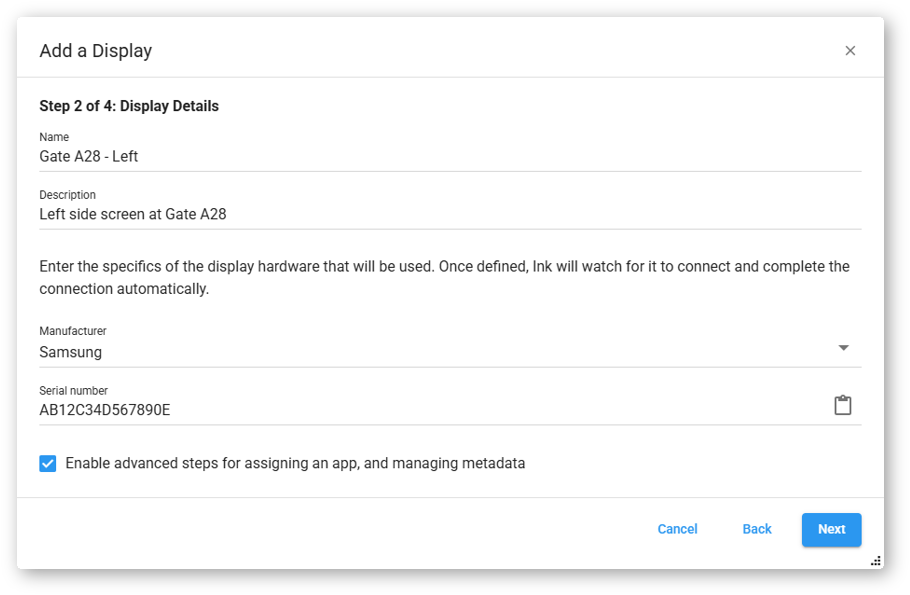
If you would like to assign an App or add metadata fields and values to the Display at the same time as adding the Display to Ink, you can extend the setup by checking the Enable advanced steps... box which will add the advanced steps to the wizard.
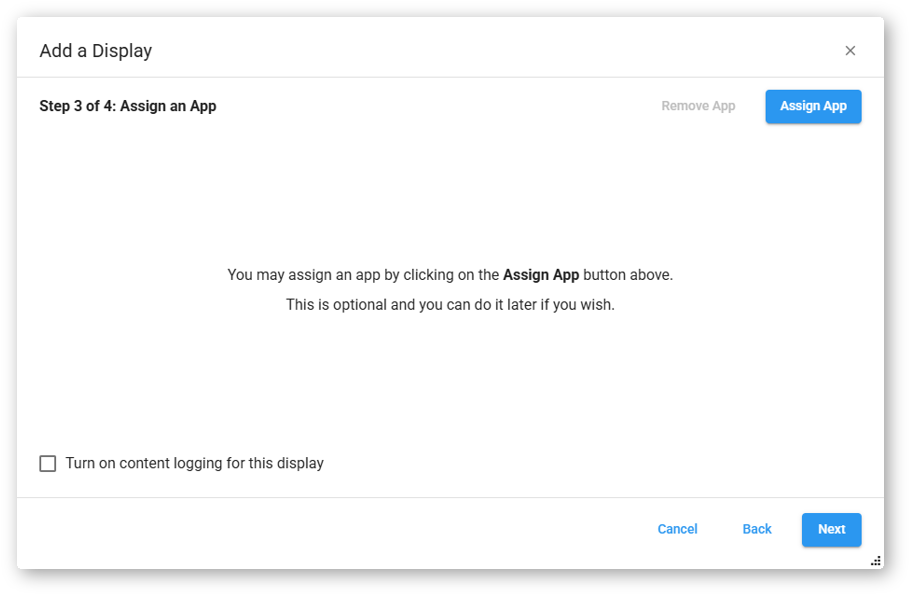
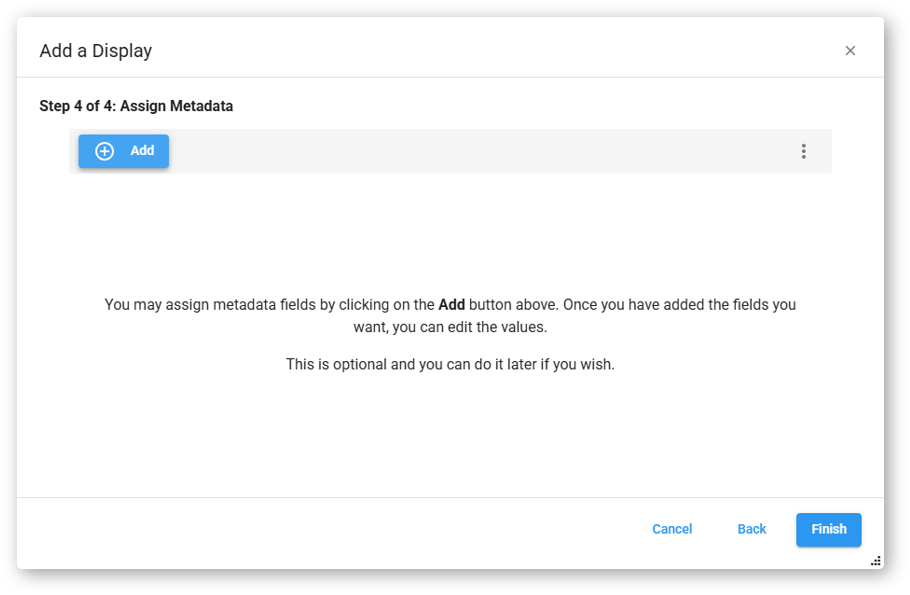
Regardless of your choice on step 1 of the wizard, the step 2 page has a checkbox at the bottom of the page that, if checked, will increase the number of steps in the wizard from 2 to 4. Step 3 allows you to select an App for the Display and step 4 will allow you to add metadata fields and values.
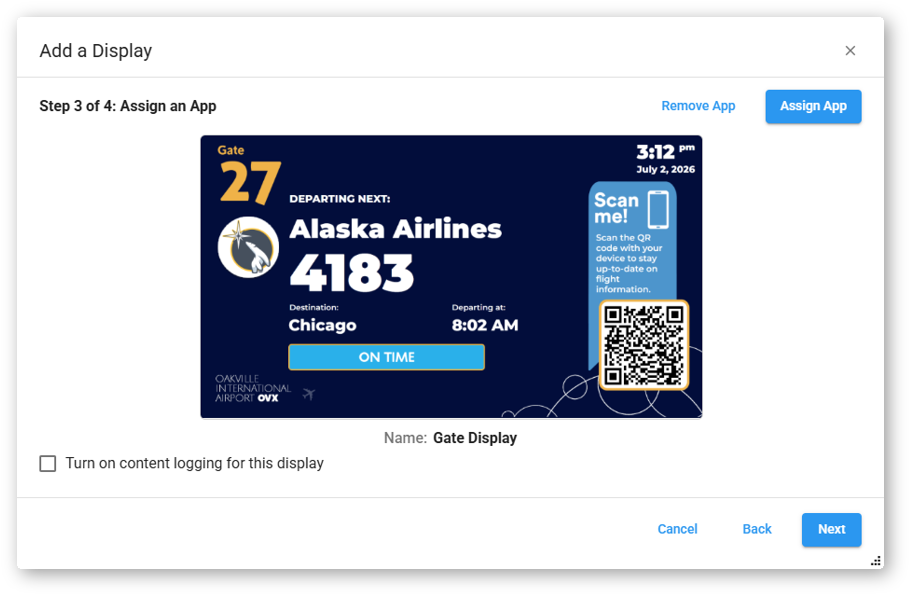
Assigning an App to a Display at this time is just like assigning an App to a connected Display. Whatever App you choose at this point can be changed at any time in the Display showcase.
Simply click on the Assign App button and select an App from the dialog that opens.
Adding metadata fields and values is also similar to the experience in the Display showcase and these values and fields can be modified at any time in the future. First, click on the Add button to open the list of available metadata fields.
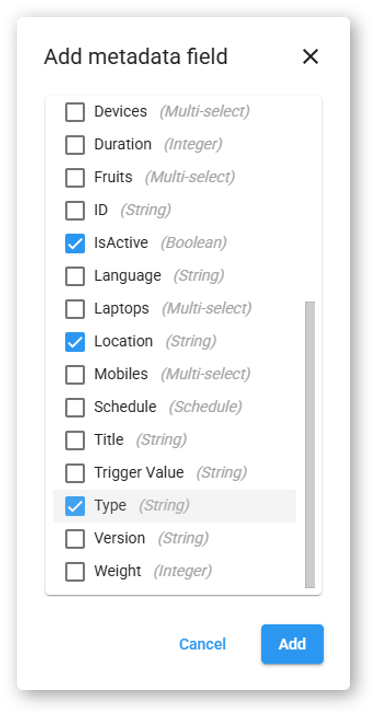
Select the fields you would like to add to this Display and click Add.
Those selected fields will be shown on the step 4 page in the wizard and the appropriate values can be entered there.
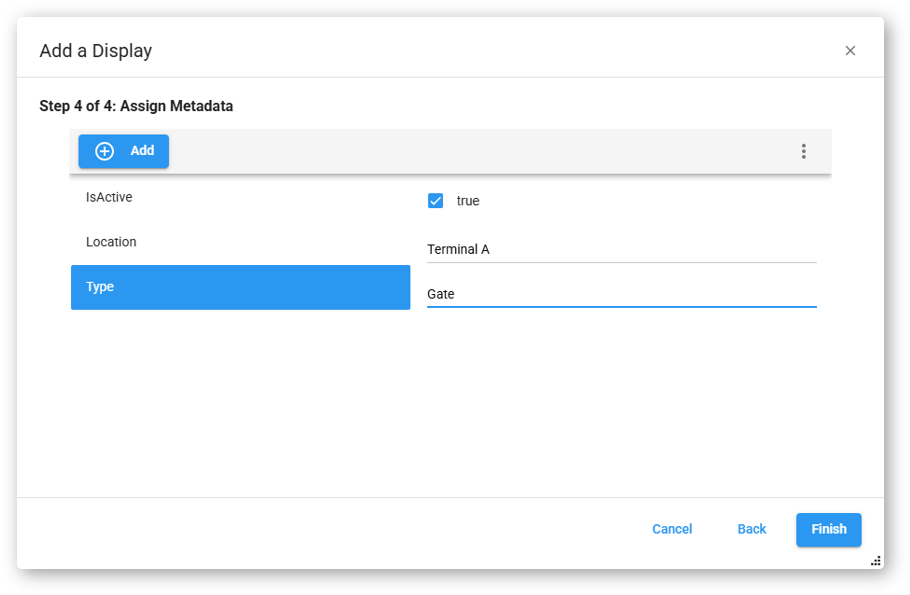
Once you have completed steps 3 and 4, click on Finish to create the Display and add it to the showcase.